Aerate Grass Lawn: Fix Compacted Soil & Boost Growth Fast
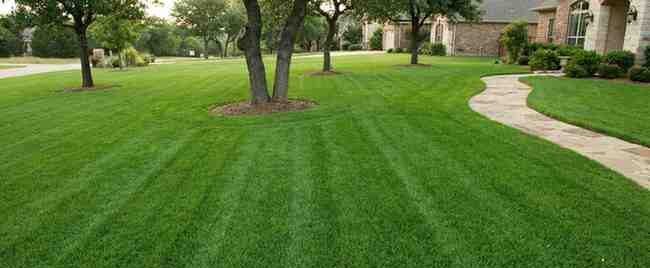
Every homeowner dreams of that perfect, carpet-like lawn—the kind that feels cool under bare feet and looks like a vibrant green emerald from the street. You water it, you mow it, and you fertilize it. Yet, despite your best efforts, your grass might look thin, patchy, or yellow. The water might puddle instead of soaking in, and the ground might feel as hard as concrete.
The missing link in your lawn care regimen isn’t more water or more chemicals; it is likely air.
Just like humans, your lawn needs to breathe. When the soil becomes compacted, it chokes the life out of your grass roots. This is where aeration comes in. Learning how to properly aerate a grass lawn is one of the most impactful secrets of professional landscapers.
In this comprehensive guide, we will explore the science of soil compaction, the differences between aeration tools, the perfect timing for your specific grass type, and a step-by-step plan to transform your yard from a hardpan wasteland into a thriving oasis.

What Does It Mean to Aerate a Grass Lawn?
In simple terms, aeration is the process of perforating the soil with small holes to allow air, water, and nutrients to penetrate the grass roots. This helps the roots grow deeply and produce a stronger, more vigorous lawn.
Over time, the soil under your lawn naturally becomes compacted. Whether it’s from children playing, pets running, the weight of lawnmowers, or simply gravity and rain, the soil particles get squashed together.
The Science of Soil Pore Space
Healthy soil is not solid; it is a mixture of solid particles (sand, silt, clay) and empty spaces (pores). Ideally, your soil should be about 50% solid and 50% pore space. These pores are crucial because they hold the oxygen and water that roots need to survive.
When you aerate a grass lawn, you are mechanically restoring that pore space. You are opening up the ground to alleviate compaction and break up “thatch.”
What is Thatch?
Thatch is a layer of living and dead organic matter—grass clippings, roots, and stems—that accumulates between the green vegetation and the soil surface.
- Good Thatch: A layer less than ½ inch thick is beneficial. It keeps soil cool and holds moisture.
- Bad Thatch: A layer thicker than ½ inch acts as a barrier. It prevents water from reaching the soil and can harbor pests and diseases.
Aeration punches through this thatch layer, introducing microorganisms from the soil to the surface that help decompose the thatch naturally.
5 Warning Signs Your Lawn Needs Aeration
How do you know if your lawn is suffering from compaction? You don’t need a degree in agronomy to spot the signs. Here are the red flags indicating it is time to aerate your grass lawn.

- A close-up photo of a person performing the “Screwdriver Test,” pushing a screwdriver into the grass.
1. The Screwdriver Test
This is the most reliable method. Take a standard flat-head screwdriver or a metal stake. Pick a spot in your lawn and try to push it into the ground.
- Healthy Soil: The screwdriver slides in easily with little resistance.
- Compacted Soil: You have to use significant force, or it bounces off. If you can’t push it in more than 2 to 3 inches, your soil is too tight.
2. Puddling and Runoff
After a rainstorm or running the sprinklers, check your yard. Does water pool in high areas? Does it run off onto the sidewalk before soaking in? This suggests the surface has formed a crust that water cannot penetrate.
3. The “Playground” Effect
Does your lawn get heavy traffic? If your yard serves as the neighborhood soccer field, the dog run, or the path from the driveway to the front door, those specific areas are almost certainly compacted.
4. Thin, Patchy Grass
If your grass looks dehydrated despite regular watering, or if it feels spongy when you walk on it (a sign of excessive thatch), the root system is likely shallow and struggling.
5. High Clay Content
If you live in a region with heavy clay soil, you will need to aerate more frequently—likely once a year—compared to those with sandy soil.
Core Aeration vs. Spike Aeration: Which is Better?
When you look for tools to aerate a grass lawn, you will find two main categories.

- An illustration showing the difference between a “Spike” entering the soil (pushing dirt sideways) and a “Core Plug” entering the soil (removing a cylinder of dirt).
Spike Aeration (The “Quick Fix”)
Spike aerators simply poke holes in the ground using a solid wedge or tine. You often see these sold as “aerator shoes” (sandals with spikes on the bottom) or simple rolling drums with spikes.
- The Problem: While poking a hole seems helpful, spike aeration often makes compaction worse. By driving a wedge into the soil, you are pushing the soil sideways to make room for the spike, compressing the surrounding dirt even further.
- The Verdict: Avoid spike aeration for general lawn health. It is only useful for very minor surface sealing on sandy soils.
Core Aeration (The “Pro Choice”)
This is the gold standard. A core aerator uses hollow tines that mechanically remove a cylinder (or “plug”) of soil and thatch from the ground.
- The Mechanism: The machine pulls out plugs that are usually 2 to 3 inches long and drops them on top of the lawn.
- The Benefit: By physically removing soil, you create actual empty space. The surrounding soil can then relax and expand into these holes, instantly relieving density and compaction.
- The Verdict: Always choose core aeration. If you are going to put in the effort to aerate a grass lawn, do it with a core aerator (plugger).
When is the Best Time to Aerate?
You cannot simply wake up on a Saturday in January and decide to aerate. Aeration is stressful for the grass temporarily; you are tearing up the root zone. Therefore, you must aerate when the grass is in its peak growing phase so it can recover quickly.

- A seasonal calendar infographic. “Fall” is highlighted for Cool Season Grass (Bluegrass/Fescue). “Late Spring” is highlighted for Warm Season Grass (Bermuda/Zoysia).
For Cool-Season Grasses
- Grasses: Kentucky Bluegrass, Tall Fescue, Perennial Ryegrass.
- Best Time: Early Fall (Late August to September) or Early Spring.
- Why: Fall is preferable. The weed competition is lower, heat stress is gone, and the grass is trying to establish roots before winter.
For Warm-Season Grasses
- Grasses: Bermuda, Zoysia, St. Augustine, Centipede.
- Best Time: Late Spring to Early Summer (May to June).
- Why: These grasses love heat. You want to aerate when they are growing most vigorously. Avoid aerating these grasses when they are dormant (brown) in the winter.
Warning: Never aerate a dormant lawn. If the grass is brown, wait until it greens up. Aerating dormant grass creates open wounds that weeds will exploit.
Equipment: Choosing the Right Tools
Depending on the size of your lawn and your budget, you have three main options for equipment.
1. Manual Core Aerator
This looks like a pitchfork with two hollow cylinders at the bottom. You step on it, pull it out, and move a few inches.
- Pros: Cheap ($30-$50), great exercise, perfect for small patches or tight corners.
- Cons: Extremely labor-intensive. Doing an entire 5,000 sq. ft. lawn this way is back-breaking work.
2. Tow-Behind Aerator
If you own a riding lawn mower or a garden tractor, you can buy a tow-behind attachment.
- Pros: Covers large areas fast.
- Cons: You need to weigh it down (often with cinder blocks) to get the tines to penetrate deep enough.
3. Power Aerator (Rental)
This is a self-propelled machine that looks like a heavy-duty lawnmower. You can rent these from Home Depot, Lowe’s, or local tool rental shops.
- Pros: Professional quality results. Pulls deep, consistent plugs.
- Cons: Heavy and can be difficult to maneuver. Rental costs usually range from $60 to $100 for a half-day.
How to Aerate Your Lawn Best
Ready to get to work? Follow this proven workflow to ensure maximum results.

- A photo of a heavy-duty red or green power aerator machine on a lawn, with soil plugs visible on the ground behind it.
Step 1: Preparation (2 Days Before)
If the ground is dry, the aerator tines won’t penetrate. If the ground is a swamp, the machine will get stuck.
- Water the lawn: Water your lawn thoroughly two days before you plan to aerate. You want the soil to be moist (like a squeezed-out sponge), not muddy.
- Mark the hazards: Use small landscaping flags to mark sprinkler heads, invisible dog fences, shallow utility lines, or shallow tree roots. The aerator tines will break sprinkler heads if you run over them.
Step 2: Mow the Lawn
On the day of aeration, mow your lawn slightly lower than usual. This helps the machine work more efficiently and ensures the soil plugs aren’t held up by tall grass blades.
Step 3: The Pass
Fire up your core aerator.
- Technique: Treat it like mowing. Go back and forth in parallel lines.
- Double Pass: For heavily compacted lawns, make two passes. The second pass should be perpendicular to the first (a checkerboard pattern). This ensures you are pulling enough plugs to make a difference.
Step 4: Leave the Plugs
After you finish, your lawn will look like a flock of geese left a mess everywhere. You will see hundreds of small dirt sausages all over the grass.
- Do NOT rake them up. Let them sit.
- Why? These plugs are full of nutrients and microorganisms. As they dry out over the next 2 weeks, they will break down and filter back into the holes, essentially top-dressing your lawn for free.
The “Golden Window”: Post-Aeration Care
You have just punched thousands of holes in your lawn. You have created direct access to the root zone. This is the Golden Window of opportunity. Do not waste it.

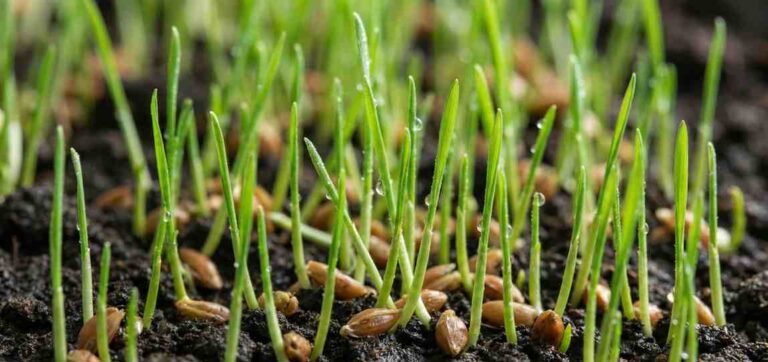
- A hand spreading grass seed over a lawn that has freshly pulled soil plugs.
1. Overseeding
If your lawn is thin, this is the single best time to plant new grass seed. This process is called “overseeding.”
- Because the soil is open, seeds can fall directly into the aeration holes. This guarantees soil-to-seed contact, which is the most critical factor for germination.
- Spread high-quality seed over the lawn immediately after aerating.
2. Fertilizing
Apply a starter fertilizer or a balanced lawn food right after aerating (and seeding). The nutrients will fall into the holes and reach the roots immediately, rather than sitting on the surface and waiting for rain to wash them down.
3. Watering
Keep the soil consistently moist. If you seeded, you may need to water lightly once or twice a day to keep the seeds from drying out. If you didn’t seed, resume normal deep watering to encourage roots to fill the new space.
Frequently Asked Questions About Aeration
How often should I aerate my grass lawn?
Most residential lawns benefit from annual aeration. If you have sandy soil or very low traffic, you can do it every 2-3 years. If you have heavy clay soil or high traffic (kids/dogs), you might need to do it twice a year (Spring and Fall).
Can I aerate in the summer?
It is risky. In the heat of summer, grass is often stressed and water is scarce. Aerating opens the soil up to rapid evaporation, which can dry out the roots and kill the grass. Only aerate in summer if you have a warm-season grass and can commit to heavy irrigation.
Will aeration kill my weeds?
No, but it helps your grass outcompete them. By fixing the soil, you empower the grass to grow thick and choke out the weeds naturally. However, be careful: if you aerate when weeds are seeding, you might spread them.
Liquid Aeration vs. Mechanical Aeration: Which is better?
In recent years, “Liquid Aeration” products have flooded the market. These chemical sprays use surfactants to help water penetrate deeper. While they can be a good supplement, nothing beats mechanical core aeration for a truly compacted lawn. You cannot spray away a 3-inch layer of compressed clay; you have to physically remove it.
Breathe Life Back into Your Lawn
Your lawn is a living ecosystem. It requires more than just sunlight and water; it requires a foundation that allows it to thrive. When you aerate a grass lawn, you are fixing the foundation.
It is a simple process with profound results. By relieving compaction, you allow roots to dive deeper. By breaking up thatch, you prevent disease. And by timing it with overseeding and fertilizing, you set the stage for a lawn that is thicker, greener, and more resilient against drought and heat.
Don’t let your soil suffocate. Check your calendar, rent that machine, and give your yard the breath of fresh air it deserves.
Quick Summary Checklist
- Check Soil: Do the screwdriver test.
- Select Tool: Use a core aerator (plugger), not spikes.
- Check Calendar: Fall for cool-season grass; late Spring for warm-season grass.
- Prep: Water 2 days prior; mark sprinkler heads.
- Execute: Make two passes (checkerboard pattern).
- Follow Up: Overseed and fertilize immediately.
- Relax: Let the plugs decompose naturally.